domingo, 28 de febrero de 2010

Dear Cochinita Pibil, I haven't stopped thinking about you since we met...


...there in Yucatan…And since then I always remember you and the nights I spent by your side, sharing the moon and lots of dinners. I love everything about you, your colour, your ingredients, and the way you look at me from the plate, almost challenging me. I pile you up, pick you up and gently let you sit on your tortilla and it’s in that very moment when pointing at my mouth, I prepare myself to enjoy what you kindly offer me, without asking anything in exchange. Thanks Cochinita Pibil, thanks, Yucatán, we’ll meet again, hopefully...one day.

 This is what Cochinita Pibil inspires me, this and much more. This dish is a flavourful representative of the excellent Mexican cuisine. The pork (cochinita or puerco in Spanish) is marinated in Achiote, a native plant from which they obtain a natural dye called Annato. Its flavour is subtle and smoked, spicy yet earthy and it gives the meat an evocative and sublime colour.


Cochinita or Puerco Pibil is a legendary dish, and it’s coked traditionally by wrapping the meat after marinating it for hours, and cooked in a pit on the ground for longer hours, it comes from the Yucatán peninsula, in Mexico. This dish has an important role in Robert Rodriguez’s brilliant movie, Once upon a time in Mexico, where Johnny Depp gets so obsessed with it, that he kills the chefs who cook  it too well. You can view Rodriguez’s recipe here, it´s really worth it.

I have cooked this dish according to the way it was served to me in Yucatán, with plantain, and refried beans,  as a side dish as well as Pico de gallo and salsa verde, two V.I.S (very important salsas). Cochinita pibil can be served with rice, or just lying on a warm tortilla, don’t forget the pickled onion though!


Ingredients

For the cochinita and the marinade

½ Kilo pork fillet or loin

3 tablespoons Seville oranges

3 tablespoons vinegar

½ tablespoon achiote powder or paste

¼ teaspoon ground cumin

¼ teaspoon Mexican oregano

4 or 5 peppercorns, ground

1 garlic clove

1 or 2 dried pasilla chillies

3 or 4 big Plantain leaves

Method

Toast the chillies, deseed and grind them along with the garlic. Mix the rest of the ingredients except the meat until you get a paste. Add the chilli mix. Prick the meat with a fork and season with salt and pepper.  Toast the plantain leaves over the flame, cover an oven tray with it, and put the meat on top, spread the marinade all over it and wrap the meat with the plantain leave forming a closed package, cover with foil and leave overnight in the fridge. The next day, bake the meat still wrapped in the banana leave, at 150 degrees for 4 hours....yes, 4 hours. Once its cooked shred it with a fork and reserve.


For the pickled onion

1 red onion

½ habanero chilli

2/3 orange juice

Salt

Mix all the ingredients and marinade for two hours


For the Salsa verde

2 or 3 green Mexican tomatoes

 1 Serrano chili

2 tablespoon fresh coriander chopped

2 tablespoons onion

1/3 cup water

Salt

Method

Blend all the ingredients and reserve.


For  the Pico de gallo

1 red tomato chopped

¼ onion chopped

¼ garlic clove

2 tablespoons fresh chopped coriander

½ jalapeno chilli chopped

1 tablespoon lime juice

Salt

Mix all the ingredients and place in a bowl.


For the refried beans

Ingredients

3 cups cooked black beans

2 tablespoon lard or butter

½ cup of the water that was used to cook the beans

Feta cheese (if you can’t find Mexican cheese)

Salt

Method

Mash the beans, chopped the onion very finely and heat the butter or lard in a saucepan, add the onion, and when it start changing colour add the mashed beans along with the beans stock and the salt, and stir constantly. The beans are done when they don’t stick to the saucepan. Sprinkle with grated feta cheese and serve.


To serve the rest of the dish: Slice the plantain and grill the slices. Place a portion of the shredded “cochinita” on a square shaped plantain leave. Top with the pickled onion. Serve with the refried beans, the plantain slices, the Salsas and some warm corn tortillas.


domingo, 14 de febrero de 2010

A sponge with everything included, it's more than a sponge


There are wonderful and unexpected flavor combinations in the gastronomic world, and this is one of them. It’s a moist, delicious and custardy sponge wonderfully cooked with a mixture of fresh fruit. The original recipe comes from the excellent The Australian Women’s weekly, and it has rhubarb which is a fruit I first tried when I moved to the UK. And I have to say that it’s not one of my favorites. This is a very easy and rewarding cake as its flavors melt in your mouth and it’s also good for you because of the amount of fresh fruit.  


I used kumquats and cherries as well, because I had them at the moment of the making of this recipe and it run put really well but you can use any fruit combination you want, pear and apple, cherry and orange, strawberry and blackberry, etc.  It keeps really well in the fridge for two to three days, if there is any leftover that is!


Ingredients

125g softened butter

¾ cup caster sugar

2 eggs

1 ½ cups self raising flour

½ cup ground almonds

2 tablespoons custard powder

½ cup milk

3 trimmed stalks rhubarb, sliced

1 or 2 pear, peeled, sliced thinly

100gr kumquats thinly sliced

100gr pitted cherries

½ cup apricot jam, warmed, strained


Glaze

1 tablespoon water

1cup icing sugar


Custard

2 tablespoons custard powder

2 tablespoons caster sugar

1 cup milk

1 teaspoon vanilla essence

20g butter


Method

Preheat oven to 180 and grease a 22 cm round cake tin.

Firs make the custard. Combine the custard powder and sugar in small saucepan. And gradually stir in the milk. Stir over heat until mixture boils and thickens. Remove from heat, add vanilla and butter and stir until butter has melted. Cover surface of custard with cling film to prevent skin forming. Cool to room temperature.

For the cake mixture, beat the butter and sugar with n electric mixer until light and fluffy, add eggs one a a time, beating well between well between additions. Using wooden spoon stir in flour, ground almonds, custard powder and milk.

Using metal spatula spread half of the mixture into prepared pan, top with half the fruit and spread the custard on top in a single layer over the fruit. Spread cake mixture over custard top with remaining fruit and bake cake for about an hour. Stand cake for 5 minutes before turning onto a cooling rack, mix the ingredients for the glaze, brush top with warm jam, glaze and serve.


lunes, 1 de febrero de 2010

Gyoza, the truth about the japanese dumpling


I love gyozas. Very much so. Form the first time I tried them here in a restaurant in London, and later in Japan, looking at the chefs and the street food vendors. They come originally from China, the Japanese adopted them, and now along with the ramen they are part of daily life in the land of the rising sun. The dough is thinner in the Japanese version, and the filling is so versatile, but the most typical is the one with minced pork. They freeze really well.


This is my friend´s Noriko´s recipe, and the only tricky thing is the way to seal the gyozas, but as they say: Practice makes perfect, and after three or four fiascos, you will be making them with your eyes closed. I love the way they are cooked, grilling them on a hot pan with little oil, and then steaming them with water. Brilliant!


Ingredients

1 packet prepared gyoza skins

250g minced pork

2 tablespoons sesame oil

1 garlic clove finely chopped

1 tablespoon flour

1 tablespoon water

2 tablespoons finely chopped Chinese chives (or normal)

3 0r 4 Chinese cabbage leaves or Savoy cabbage

2 tablespoons soy sauce

Salt and pepper

For the sauce

Soy sauce

A little chilli oil or rice vinegar


Method

Boil the cabbage leaves for 4 minutes. Drain and chop finely. Mix with the pork, the sesame oil, the garlic, the water, the flour, the soy sauce the chives and the salt and pepper. Place one gyoza skin in one hand and pt one teaspoon of the filling in the middle, brush half the edge with water and seal trying to follow the pattern, and keeping the folds.


To cook the gyozas, put a tablespoon of vegetable or sunflower oil in a pan, place the gyozas and grill only on one side for 3 to 4 minutes, then add a splash of water and cover the pan, so they cook in the steam. Leave them for 3 or 4 more minutes. For the sauce, mix the soy sauce and the chilli oil or rice vinegar and serve wit the hot gyozas. (One bite)


miércoles, 20 de enero de 2010

Sorry, a "what" sandwich?


Lemon sponge sandwiches with raspberries, blueberries and cream

I love Tessa Kiros, she is an unconventional cookery books author who combines familiar history with ancestral recipes, excellent photos and flavors from different countries where she spent her childhood, mixed up with beautiful colors and the flavors of her past. Her books make you wanting to run to the kitchen and starts trying out her wonderful recipes. Far from being pretentious, her wisdom and elegance takes us to her kitchen and she teaches us that the best of cooking is the fact of sharing what you are coking. I only have two of her books, Falling cloudberries, and Apples for jam and this cream sandwiches recipe comes from the latter one. This post is from the latter one, and is as easy as making a sandwich, but far much better...


Ingredients

For the lemon sponge

250g Butter, softened
280g caster sugar
3 eggs
310g plain flour
1 1/2 tsp Baking powder
1 lemon, finely grated zest and juice
185ml single cream
1 tsp vanilla extract


For the filling:
100ml whipping cream
2 tsp icing sugar
100g plain Greek yogurt
100g Raspberries, halved
icing sugar, for dusting


Method

Preheat the oven to 170°C
Butter and flour a 30 x 11cm loaf tin.
To make the lemon sandwiches; cream the butter and sugar until light and fluffy. Beat in the eggs one by one. Sift in the flour and baking powder; then add the lemon zest, lemon juice, cream and vanilla, whisking well to a smooth batter. Spoon into the loaf tin and bake for about 1 hour 10 minutes, or until a skewer inserted into the centre comes out clean. If the top looks like it’s getting too brown before the cooking time is up, cover it with foil. Remove from the oven and leave to cool.

To make the filling, whisk the cream and icing sugar together until the cream holds peaks, and then fold in the yoghurt. Cut the cake like a loaf of bread into slices about 5mm thick.
Spread half the slices with the cream mixture and then top with the raspberries and the rest of the cake slices to make sandwiches.
Dust with icing sugar to serve.

The sponge is delicious just baked from the oven and on its own. But for these sweet sandwiches is better to cut the slices the next day, if you can wait (I couldn't)


lunes, 11 de enero de 2010

A rainbow in my plate


This is my first post of the New Year, and I wanted it to be a light one, after the holiday’s lovely meals and sweets. Swiss chard is one of my favourite vegetables, and one of the things that got my attention when I moved to London was to find coloured chard, we don’t have those in Spain, and you can find them all year round, whereas in the UK they are seasonal, so every time I see them I “have” to buy them. The white part is very wide and hard and I don’t use it for this recipe.


It can be made as a round tart or with a rectangular shape and the base is really simple to make, and you need to start the day before for the marinade.

I would like to take this opportunity to wish every one a Happy New Year.


Ingredients

500g Swiss chard

Handful of sultanas

Half red pepper diced

3 spring onions finely sliced

Handful of pine nuts

Drizzle of olive oil

1 teaspoon smoked paprika

Salt and pepper


For the base

500g flour

100ml water

100ml olive oil


Method

Finely slice the chard (only the green part), and place them in a salad bowl with the diced pepper, the spring onion, the pine nuts and the sultans, drizzle the olive oil, the paprika and salt and peppr, mix well and leave overnight in the fridge.

Squeeze the excess liquid and reserve. Mix the ingredients for the base and roll it our very finely, place it on the tray or the tin you are going to use. Spread the filling all over the base and bake in the oven at 180 for 30minutes if it starts getting brown cover it with foil and carry on baking it.


domingo, 20 de diciembre de 2009

Dickens, six pence and a London pudding


Christmas pudding has that special Dickensian” touch that takes you back to old England, although there are reports coming as far back as the xv century. Legend has it that on the last Sunday before the beginning of the Advent, families returning from church started to make the Christmas pudding as it follows, they used t take turns to stir, and make a wish while ding it, that’s why it’s called “stir-up Sunday” They used to “bury” a sixpence coin in the pudding for the one who found would be lucky for a year.

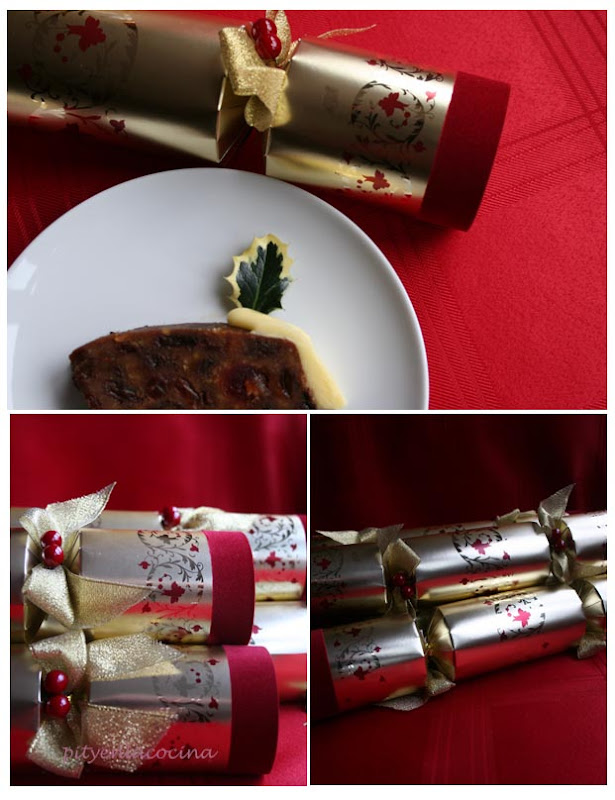
One of the things I like the most of the English Christmas is the Christmas crackers, (we don't have these in Spain) like a beautiful candy wrapped beautiful packet that you and the person sitting next to you at the Christmas table have to pull to open it up, you then hear the cracker and an array of presents comes from inside, there is usually a paper hat (and yes, you HAVE to wear it) a quiz or a joke and a small present (how it is it ends on how much money you spent in the Christmas crackers) If you can't find the suet in the recipe, you can use butter.


Christmas in England is very different from the one in Spain, firstly and on the night of the 24th we gather and celebrate (with food, of course). This is called Nochebuena, or Goodnight, and is like a preparation of what it’s coming ahead of us. The 25this the unwrapping of the presents as well, and more food to celebrate Christmas Day, the 26th is a St Stephen and we celebrate this, as well as the night of the 31st, (big time of course) when after the meal, we sit with a bowl containing 12 grapes, and at midnight and with every stroke of the clock we eat one, after another, very focused, and thinking about what will next year bring and making a wish with every grape, 12 grapes, 12 months, and these are called the Lucky grapes. Everybody in Spain does this, and we can’t imagine a New Year’s Eve without them...


Ingredients

300g fresh white breadcrumbs

100g self-raising flour

1 tsp mixed spice

1 tsp ground cinnamon

½ whole nutmeg, very finely grated

350g raisins

100g mixed peel

50g flaked almonds

250g suet

225g demerara sugar

225g sultanas

225g currants

2 carrots, peeled and very finely grated

2 cooking apples, peeled and very finely grated


Wet ingredients

Zest and juice of 1 orange

Zest and juice of 1 lemon

1 small wine glass of brandy

2 tbsp black treacle

4 eggs, lightly beaten

Fort the brandy butter

150 g softened butter

150 icing sugar

4 0r 5 tablespoons brandy


Method

Put the breadcrumbs in the biggest mixing bowl you can find. sieve the flour into the bowl with the mixed spice, cinnamon and nutmeg. Then add the remaining dry ingredients, up to and including the grated apples. Combine all the wet ingredients in a jug. Pour the mixture over the dry ingredients and mix together, from east to west, with a big wooden spoon. Take it in turns to give it a stir, close your eyes and make a wish.


    Cover the bowl with a clean, damp cloth and leave overnight. . Butter 2 x 1.2-litre pudding basins and spoon the mix into them. Place a disc of baking paper on top of the puddings, then seal with a big sheet of baking paper with a central pleat, to allow expansion. Cover with a cotton or muslin cloth and tie with string or foil. Steam for 6 hours in steamers, or in pans with simmering water that reaches two-thirds up the sides of the basins – be sure to keep the water topped up. Remove and allow to cool.

      When cool, re-cover the basins and store in a cool, dry place. On Christmas day, or the day you’re going to eat the puddings, steam for another 1-2 hours. Turn the pudding onto a plate, then pour 75ml of brandy into a ladle and carefully warm over a low heat for 1 minute or so. Light the brandy using a long match and tip over the pudding just before serving. Serve with the brandy butter or custard.

        And happy Christmas everyone...

        martes, 15 de diciembre de 2009

        Cranberry and fig loaf, of course, it's Christmas!


        Ina Garten is one of my favourite cookery authors, and not because of what she cooks and her recipes, but because how she cooks it, with such elegance and charm. I even like the way she arranges a table centre piece, this woman knows what she does, and even more after quitting her job at the White House and focus in her food related career. She enjoys spoiling her guests, same here, she absolutely adores French cuisine, me too, she has a huge and impressive house...not me.


        This recipe is called “Cranberry harvest muffins” and comes from one of her books, but I converted it into a cake. Cranberries acidity is gracefully offset by the mix of the castor and brown sugar and it gives the cake that spice and lovely touch.

        You can find cranberries everywhere in the USA and England at this time of the year, but if you can’t wherever you live, just use some raspberries, blueberries, or even blackberries. The glaze is optional but I really love the shiny finish and sweet looks.

        Ingredients

        3 cups all-purpose flour
        1 tablespoon baking powder
        1/2 teaspoon baking soda
        1/2 teaspoon salt
        1 tablespoon ground cinnamon
        2 teaspoons ground ginger
        1 1/4 cups whole milk
        2 extra-large eggs
        1/2 pound unsalted butter, melted and cooled
        1 1/2 cups coarsely chopped fresh cranberries
        1/2 cup medium-diced figs
        3/4 cup coarsely chopped hazelnuts, toasted and skinned
        3/4 cup brown sugar
        3/4 cup granulated sugar


        Directions

        Preheat the oven to 180degrees.Grease and flour a 30x12cms rectangular cake tin.
        Sift together the flour, baking powder, baking soda, salt, cinnamon, and ginger in a large bowl. Make a well in the centre of the mixture and add the milk, eggs, and melted butter. Stir quickly just to combine. Add the cranberries, figs, hazelnuts, and both sugars and stir just to distribute the fruits, nuts, and sugar evenly throughout the batter.
        Spoon the batter into he cake tin and bake for 40-45 minutes, until browned on the top and a toothpick inserted in the centre of the muffins comes out clean. Cool in the tin for 5 minutes before placing in a cooling rack. Best served the next day, so the flavours develop.